Data Filter Pro Filtering Panel Full Tutorial: From Login to Exporting Leads
If you’re new to lead filtering or simply want a smoother process, this Data Filter Pro Filtering Panel tutorial walks you through everything—step-by-step. From signing in to exporting verified leads, this guide will help you fully harness the power of the Data Filter Pro.
Whether you’re a freelancer, digital marketer, or agency, understanding how the platform works can drastically improve your targeting and outreach results.
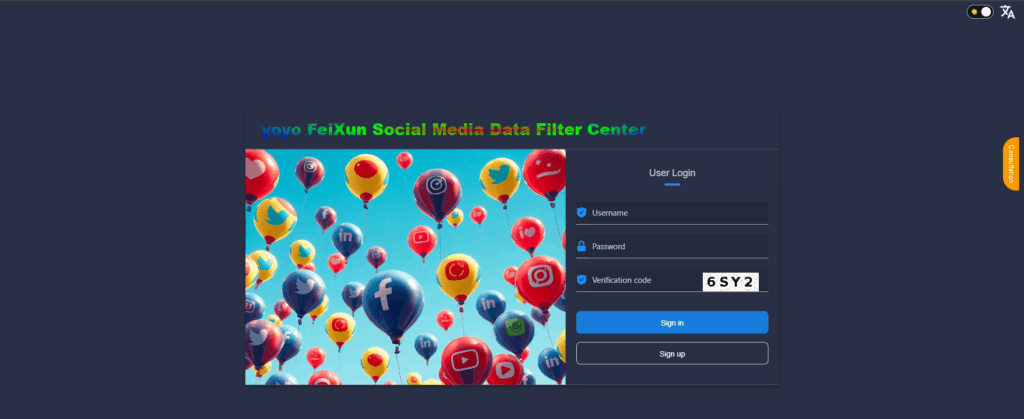
Step 1: Logging into theData Filter Pro
To begin, head to the Data Filter Pro login page. Enter your registered email and password. If you haven’t registered yet, click Sign Up and follow the quick registration process.
✅ Tip: Save your login credentials in your browser for faster access next time.
Once logged in, you’ll be directed to the dashboard—your central control hub for all filtering activities.

Step 2: Checking Your Points Balance
At the top of the dashboard, you’ll see your points balance. This is the credit system Data Filter Pro uses, allowing you to pay only for the leads you filter. If your balance is low, you’ll need to top up before starting any job. Learn more about this in our guide on Data Filter Pro Points Balance.
Step 3: Uploading Your Number List
To begin filtering:
- Click on the Upload Filter section.
- Choose whether to paste numbers manually or upload a .txt file.
- Select the platform(s) you want to filter for — WhatsApp, Telegram, Viber, or Facebook.
- Press Submit to start the process.
Your points will be deducted automatically based on the number of entries and platforms selected.
⚠️ Make sure your numbers are in international format for accurate filtering.
Step 4: Using the Global Number Generator
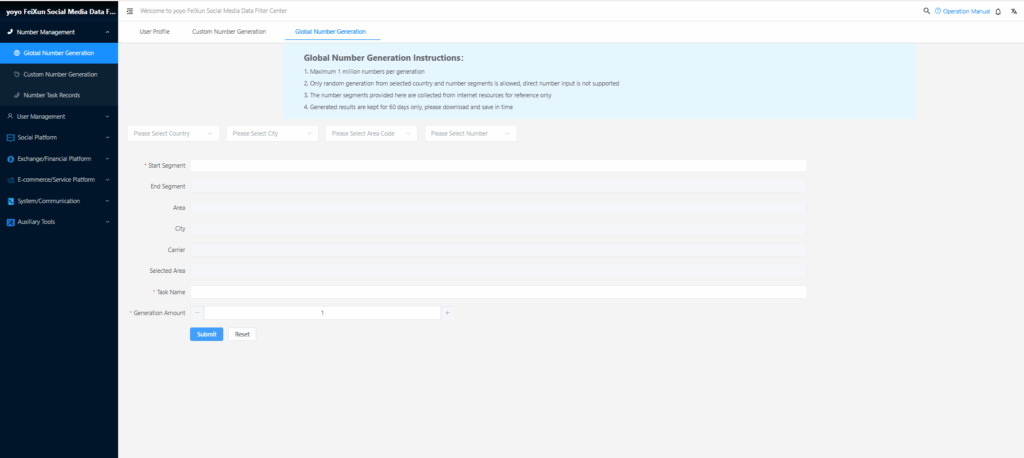
If you don’t have your own contact list, Data Filter Pro allows you to generate numbers globally:
- Navigate to Global Generator
- Choose the country or region
- Define the range or amount of numbers you want
- Submit and wait for the tool to compile your fresh list
Step 5: Filtering Your Data
Once uploaded or generated, your data will move to the filtering engine. Here, the system checks for real-time activity across the selected platforms. This can take a few seconds to several minutes, depending on the volume.
⏱️ Pro Tip: Run smaller batches for faster results, especially during peak usage hours.
You’ll receive confirmation once the filtering process is complete.
Step 6: Exporting Leads
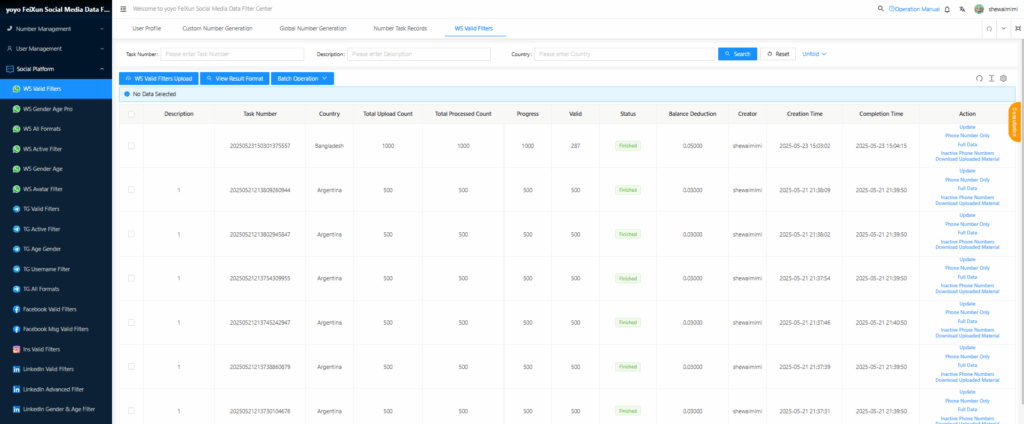
Once your filtering is finished, head to the Export Center or Filtering History section. Here, you can:
- View filtering details (date, volume, platforms)
- Re-download previous results
- Export clean lists in .txt or .csv formats
These lists are now ready to be imported into your marketing tools, CRM, or messaging platforms.
Bonus Integration Tip on Data Filter Pro Filtering Panel
After exporting your leads from Data Filter Pro, tools like ScreenMyData can help you format, clean, and segment your list even further. It’s a great complement to the Data Filter Pro Filtering Panel.
Final Thoughts on Data Filter Pro Filtering Panel
This Data Filter Pro Filtering Panel tutorial gives you a complete roadmap—from logging in to exporting high-quality filtered leads. By mastering each step, you’ll save time, reduce ad spend, and connect only with active users on platforms like WhatsApp and Telegram.
Ready to start filtering smarter, not harder?
Log in now and unleash the full potential of the Data Filter Pro.